Finally! Let’s finish this sucker up. You might want to reread the first two parts which deal with construction and painting.
- Building Cellar Dwellers’ Blacksmith shop – Part 1
- Building Cellar Dwellers’ Blacksmith shop – Part 2
First the excuses as to why this took so long to complete; Last year my father died and while I dealt with that, my mother ended up in hospital for 3 months. I was a little preoccupied and didn’t do much hobby stuff. Getting back on track now.
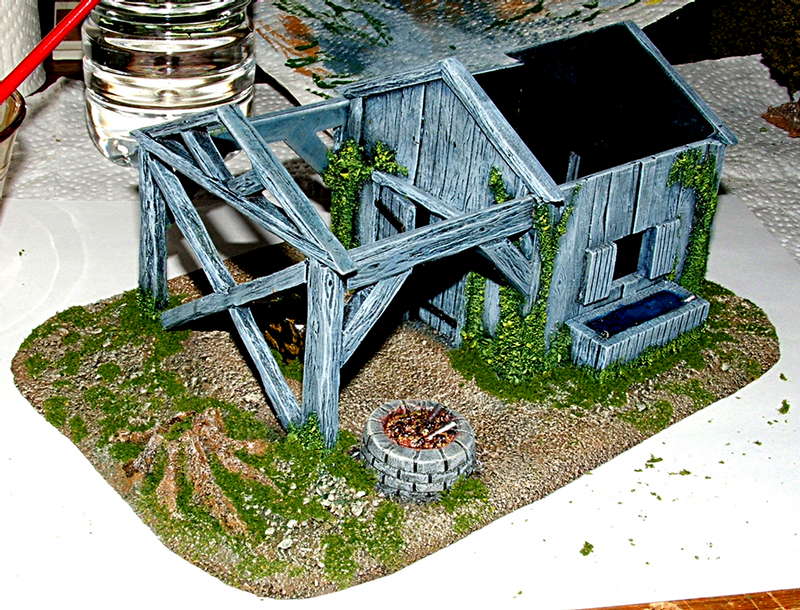
 Lets start where Part 2 ended. Here is the painted building. It looks a little unfinished because the ground cover isn’t complete. I could have taken the quick way out and just painted the ground green but, like I’ve said before, “It just doesn’t look that realistic.”
 The first step is to lay down some course ground cover. Now’s a good a time as any to make up a rule. “Uniformity is bad!” Yes, I know… sometimes it is but we’re talking about ground cover, not a putting green. This level of cover is coarsely ground foam. I apply it randomly with the higher density against the building. Because it’s course, I dot the surfaces with glue and press the foam in place with tweezers.
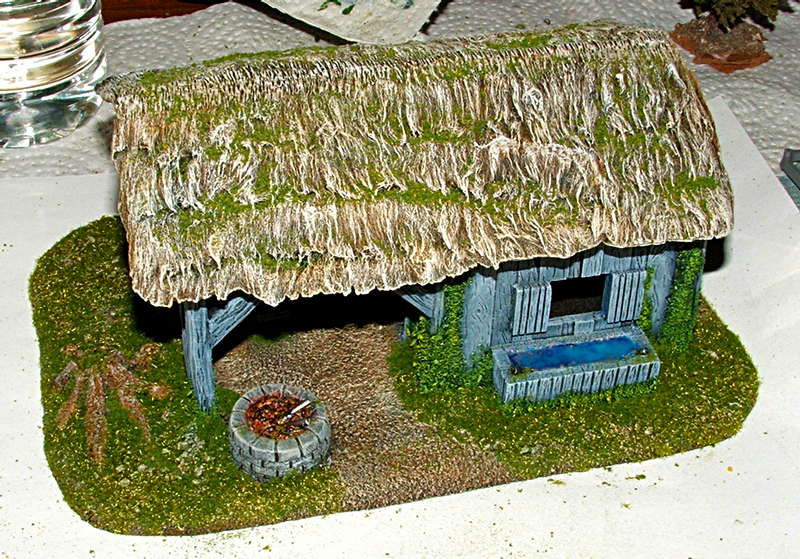 The next step uses flock. In this case it’s the coloured sawdust version. Very fine and Uniform (bad… remember?). I use a mix of white glue and magic wash (Magic wash is a mix of water and Future Acrylic Finish) to attach the flock. Dipping a paint brush in the glue mix (dedicated to gluing) I draw a messy trail and then sprinkle flock on it. Use an old spice shaker. You can see from the picture that I also flocked the roof. I figured that an old roof would pick up moss and other growths as it ages. As you can see, we have a nice uniform covering now.


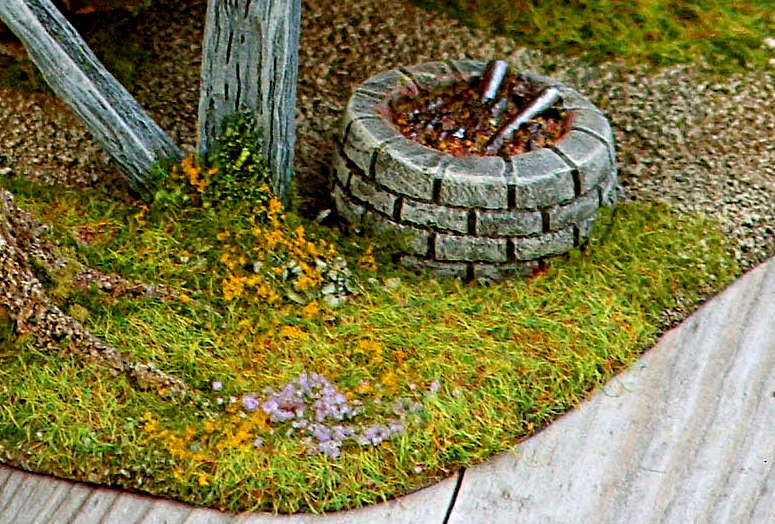
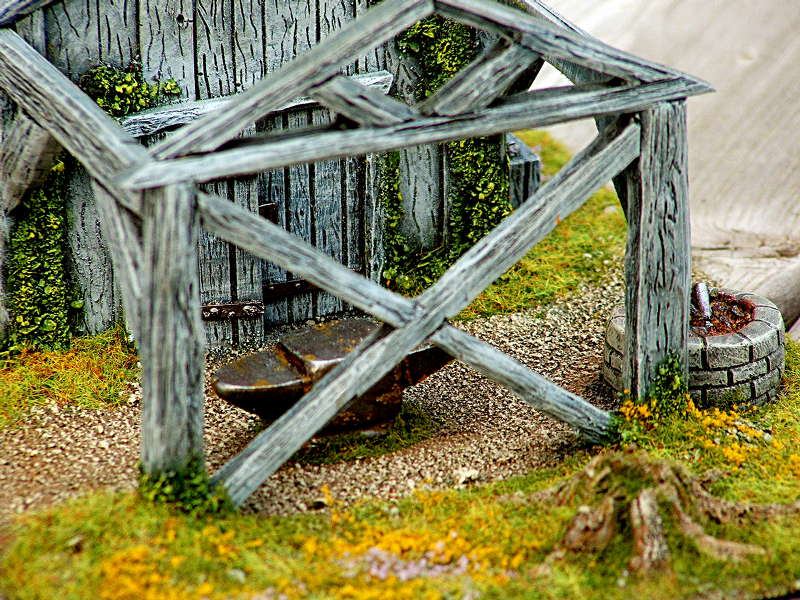
Time for some colour. I’ve never tried this stuff before but I bought some Flowering Foliage from Woodland Scenics. This is a mat of coloured foam that you pull apart to make random bunches of “flowering” plants. In the picture, I’ve circled a couple of spots where I bulked up the course ground foam. The yellow and purple foliage is pulled apart and applied randomly not just on the ground but pulled up the building too. With this stuff, you put it down first and then spray scenic cement on it. This is a thin white glue that dries clear and has a matt finish. I hate making buildings look like they’ve been stuck down on top of something. I always try and blur the transition between ground and structure.
I could actually be done now and have a good looking piece of terrain but that would be too easy. When you’re done leave the piece and go back the next day. Look at it and decide what you don’t like. I decided that my “grass” was too short. I’ve never really been happy with static grass. Off to the hobby store… Woodland Scenics section… nada. Obviously not a complete selection but nothing that spoke to me. Off to another hobby store. I found some NOCH grass that was longer and had more colour variation. Going over the existing flock, I applied the new ground cover.
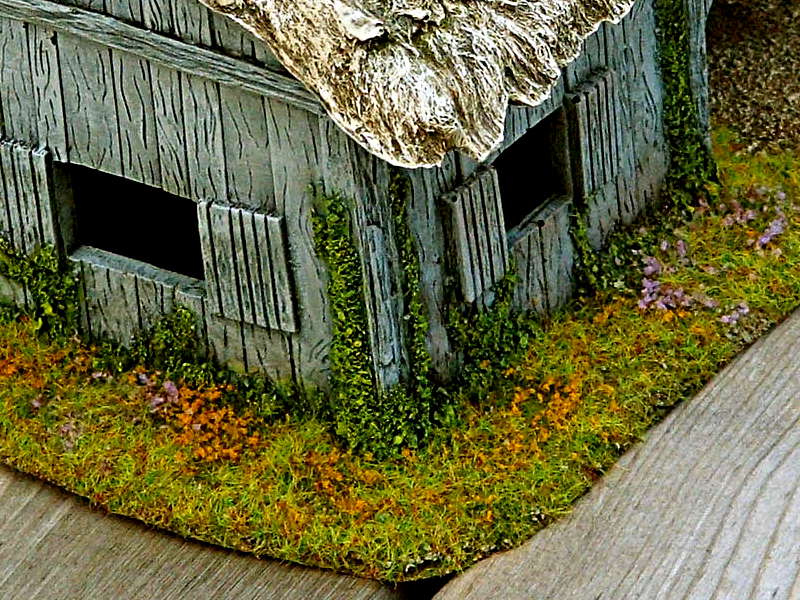
One final step and I’m done. No matter how good you are with dry brushing, it doesn’t work for everything. Especially since it works on the top surfaces. I used some brown weathering powder to go along the bottom edges of the building. This helps to blend the transition from building to ground as it brings the “dirt” up the walls. Wood will rot from ground contact so the staining helps show this.
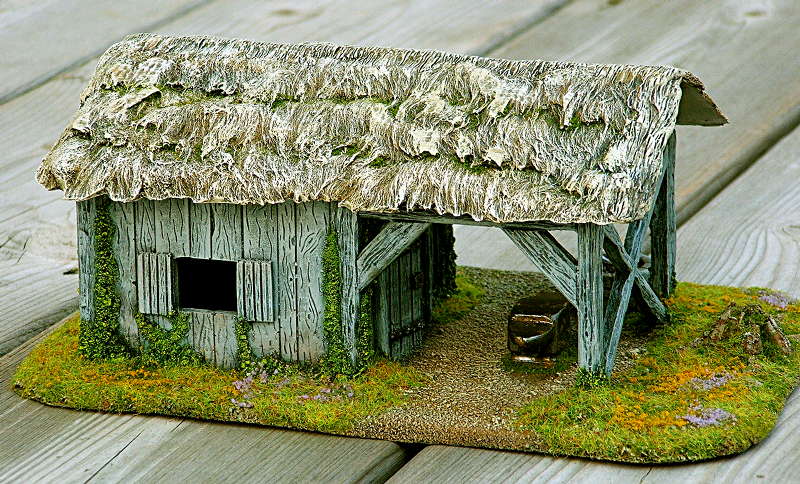
I’m quite happy with result. I know that reading this series will give the impression that it’s far more complicated than it actually is. I certainly made it more complicated with the removable roof. Is the model done? For now 🙂 I may super detail it later. Add some tools to the walls, maybe stick on a sign. A barrel of weapons? Who knows. Half the fun that I get from terrain building is doing the extra bits that help a model stand out.
The Finished Product


0 Responses
Stay in touch with the conversation, subscribe to the RSS feed for comments on this post.
You must be logged in to post a comment.