While building a desert gaming table specifically for my Warhammer Skaven and Imperial Guard Tallarn units, I decided to try a new terrain making method: Spray Foam. Sold under a variety of different brand names, with Great Stuff being the most popular, the foam is commonly used as an insulator and all-purpose sealant in places such as where conduit or water pipes enter your home directly through a wall. I had seen it many times in my travels and noted how much the expanded foam resembled rock formations, so it was a natural leap to want to experiment with it on my gaming table.
WARNING WARNING WARNING
Spray Foam is incredibly sticky and toxic in its "wet" form. Use this product OUTSIDE and over a rag or unwanted board or concrete slab. You get this stuff in your Mom's carpet and you might as well leave now before she gets home. Please observe all further safety warnings as I reveal them to you. Be sure to read this article all the way through before attempting anything, I might be able to save you a lot of grief.
MATERIALS
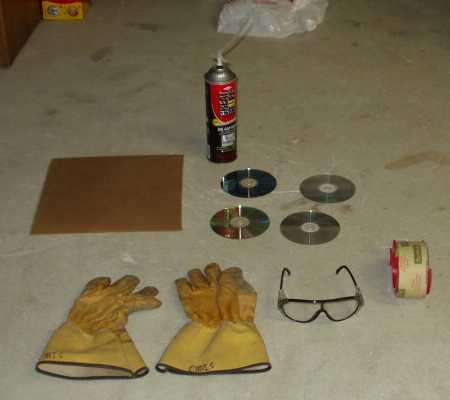
- 1 can of Great Stuff or similar expanding foam. I used the "super expanding" formula for my project, but, as you will see, maybe i should have started with the standard batch.
- GLOVES AND EYE PROTECTION. I'm not kidding, sticky, sticky, sticky.
- Hardboard pieces or CDs. CDs are great for all sorts of terrain projects, this one included. Be sure to trim your hardboard to the desired shape before you spray. No special prep is needed for either item, but I like to bevel the edges of my hardboard, it just looks better.
- Tape. I used a piece of tape to cover the whole in the middle of the CD.
- flock, glue and paint
GETTING STARTED
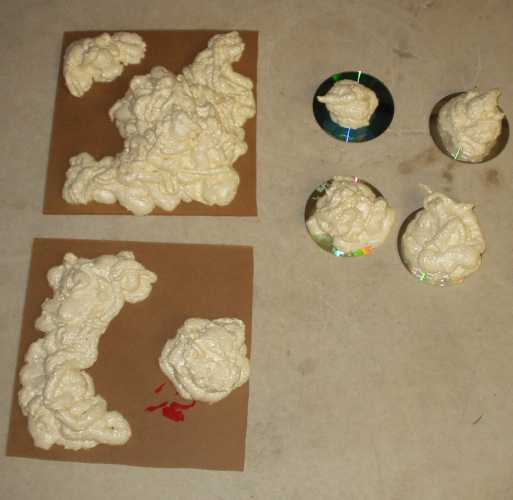
Read the instructions carefully on the side of the can. Besides the warnings i have already given you, an important fact to remember is that you are only going to get to use this can once. When you stop, and put the can back on the shelf, any foam in the nozzle/hose is going to solidify, rendering the product useless. If you are going to try this, make a bunch at one time. The picture shows what the raw foam looks like on the hardboard and the CDs. When spraying, be sure to "stir up" the foam with the straw, injecting foam directly into the blob. This will help avoid the "poop" look that this foam is great for.
Let the foam completely dry/expand overnight after you are happy with the basic shapes. They will change a little, settle a little in different areas, but should retain about 90% of your desired shape. This foam has the consistancy and weight of whipped topping in a can, and is just as difficult to work with.
SHAPING
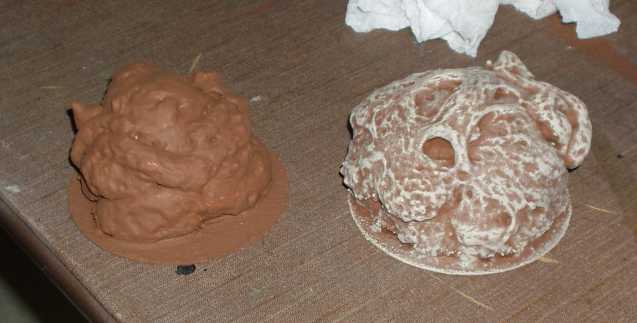
Surprise! It is nigh impossible to do much with the foam before or after drying. A large sharp razor knife (not an exacto, but the long disposable blade) can be used to make cuts in the foam, but it is sloppy at best. My good hot wire foam cutter bogged down very quickly on this foam, and smelled horrible. When I did make some cuts to make "steps" or flat areas to mount equipment, the exposed foam would change shape by the next day! Bottom line: If you need to make many cuts, consider using pink insulation foam instead.
PAINTING
This is a good time to apply any sandy flock to the base if you so desire. I like to paint the base in Elmers Wood Glue and dip in a box of sand. Allow sufficient dry time. If you like to flock after painting, then move on.
Unlike most foams, spray paint will not eat the foam; it also wont stick to the foam and rubbed off very easily. Go buy some interior house paint in the colors/highlights you want. This paint is pretty cheap, and is great for large surface work like this. Paint in your darkest colors first, black or dark brown, then work up with drybrushing lighter greys and whites or browns and tans, respectively. Be sure to drybrush the sandy flock (if applicable) the same colors. Allow sufficient dry time.
FINISHING TOUCHES
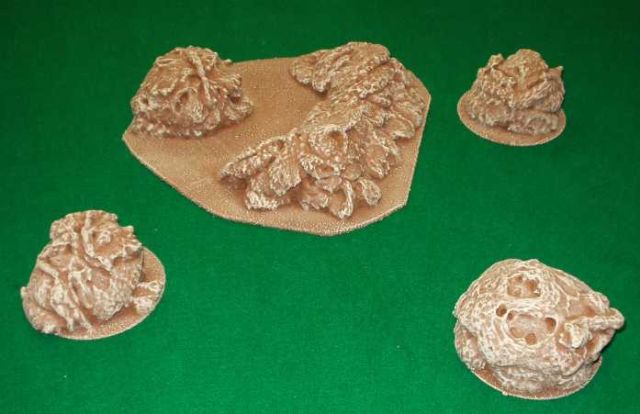
I like to add a touch of grass, even to desert terrain like this. Accumulated moisture and shade would encourage some growth, the occasional mushroom, what have you. You can even do this in the little nooks and crannies of the rocks, anywhere where moisture and soil would build up. A few touches of white glue, a sprinkling of Woodland Scenics foam flock, viola, low lying grasses. A tuft or two of taller grass wouldnt kill anyone either. For more of a "jungle-ly" feel, put on lots of grass, vines, a skull, etc. Here, green is your friend, and yes, some trees do grow on top of rocks, but that is another article.
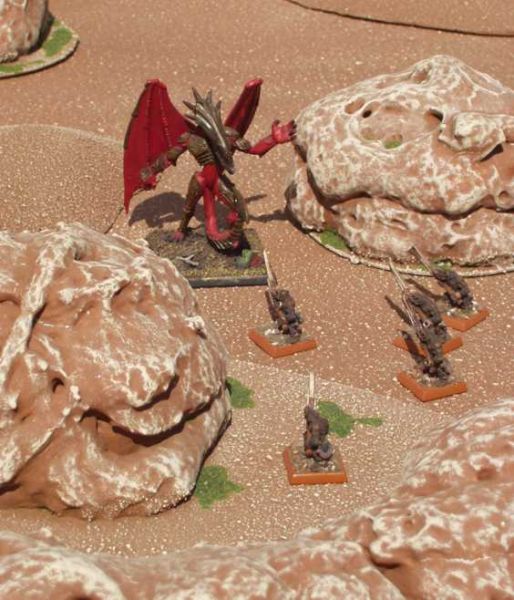
Escaping Skaven slaves find a surprise waiting for them in the desert.
CLOSING STATEMENT
What a mess. The foam smells bad, sticks to everything, wont cut right, wont "stack" much when it is wet without a superstructure of some sort, takes time to dry, and then after all that, seems to be continuing to expand and contract months later. on top of that, the smaller rocks look just like poop if you dont blend in the "tapered tail" where the foam comes out of the can. I would have been better off carving my own boulders from pink insulation foam. In my opinion, this stuff has its place in terrain world, but this isn't it.
Hamster Boy

0 Responses
Stay in touch with the conversation, subscribe to the RSS feed for comments on this post.
You must be logged in to post a comment.