Why a mini review? Simple… I bought the Warhammer Building Set (The Big One) and if I tried to do a how-to, I’d never (EVER) finish it.
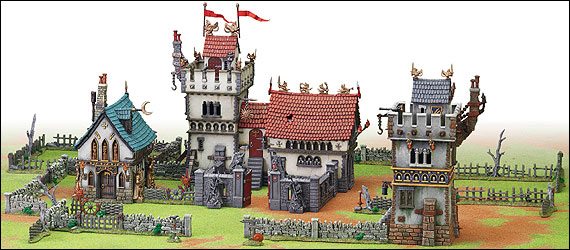
I ordered it by mail even though I live near 3 GW Stores. At the price of $180CDN, it qualified for free shipping anyway. Why would I, a terrain God (*Cough*), buy such a massively expensive set? So I can do an article of course. I also throught it was a good deal. The set contains the Fortified Manor, The Church, The Tower and three sets of walls and fences (not 3 fences… 3 SETS of fences).
Obviously, the Fortified Manor is the Church and Tower connected by hallway with large, gated walls to make a courtyard.

My first impression upon receiving the box was: “Jeez! That’s a big box.” Opening it, I thought: “Jeez! That’s a lot of sprues.” I was afraid when I ordered it that it would be lightweight plastic with thin walls. I was pleased to see that I was wrong. These are nice thick sprues.

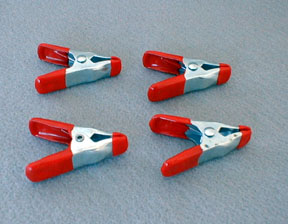
Where to start? The Church. It’s the simplest to construct. That would give me a feel for the fit of the pieces. As with most model buildings, making the corners square is tricky. I glued all four walls at once and the wrapped two rubber bands around the building at different heights and used small spring clamps to hold the corners. Working quickly before the glue set, I put a block of bass wood inside the building and trued up the angles. Minor adjustments to the clamps held the building until the glue set.
The clamps worked because the stone block designs of the model give them something to hold on to. The clamps themselves probably saw more usage while building this model than they ever have before. Especially on the roof.
 Do yourself a favour though and get a precision plastic glue like the Humbrol one. The long brass tube really makes it easy to reapply extra glue to inside seams, etc.
My least favorite activity in the universe is cleaning off mold lines. Luckily, they aren’t bad but there are a LOT of them. I did notice that several places where the two mold halves meet, the flat surface is slightly convex so watch your fit. You will have to cut it flat. There is a problem with fit though, at least on my set.

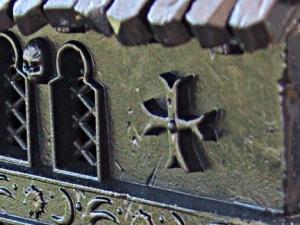
I cut, filed and green stuff‘d the joins. Thank god (God?) for carving tools and probes. As you can see from the pic in the bottom right corner, not all the problems are just filling gaps. I had to shape green stuff recreate the ledging. When I got to the Fortified Manor, I was SICK of cutting, scraping, filing, filling, shaping, screaming, etc. I went and bought a Flex Shaft for my Dremel and used it. What a difference! If you don’t have shakey hands, and have the right bits, you’ll save a TON of time. It is dangerous though, one slip and you’ll do major damage to the building.
 If you take your time and put in that little extra effort, you’ll have some great looking buildings. Truthfully, I don’t understand why anyone would spend this kind of coin and NOT fix the flaws. As you can see in the picture the join has completely disapeared and the ledge has been repaired.
The extra sprues in the box are the wall sprues. They have a nice mix of types but since there are 3 sets, you get a lot of repitition.

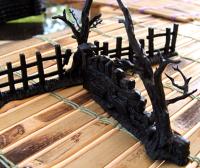
A set comes with two sign posts and two wall sections have trees. A little creativity will let you create enough variety so that you don’t have 3 of the same item on the table. I shaved off the city names on two of the signs, I’ll paint something in when I finish them. Also, since the trees are single part models, they are a little two dimensional. I used a left over sprue of some tree men and added a couple of branches to give the trees some depth.
Now that the buildings are basecoated, I now have to decide whether I leave them as standalone buildings or do I follow my normal habit of basing them. That’s another article though. 🙂
Summary:
- Value: Very Good – I’d say great but this set is a limited run so not available forever.
- Quality: Very Good – The above mentioned issues stop it from being excellent.
- Level: Advanced – This isn’t a set for the faint of heart. Green Stuff is an absolute must with this model.
Discuss this article on our sister site: www.dungeoncrawlers.com
Copyright © Games Workshop Limited 2007. Games Workshop, the Games Workshop logo, the Nemesis Crown logo, the Nemesis Crown, Warhammer, Warhammer logo, GW, White Dwarf, Citadel, the Citadel Device, Chaos, Nurgle, Tzeentch, Slaanesh, Khorne, the Chaos faction logos, Bretonnia, Kislev, Dogs of War, Elf faction logos, Ogre Kingdoms, Gnoblars, the Ogre Kingdoms faction logos, the Tomb Kings of Khemri, Tomb Kings logos, Vampire Counts, Dwarf logos, Orc & Goblin devices, Night Goblins, Skaven, the Skaven symbol devices, and all associated marks, logos, places, names, creatures, races and race insignia/devices/logos/symbols, vehicles, locations, weapons, units, characters, products, illustrations and images from the Warhammer world are either ®, TM and/or © Games Workshop Ltd 2000-2007, variably registered in the UK and other countries around the world. All Rights Reserved.

0 Responses
Stay in touch with the conversation, subscribe to the RSS feed for comments on this post.
You must be logged in to post a comment.