 Welcome Back! This is part 2 of my 3 part mini-series on building Cellar Dweller’s Blacksmith shop. It’s been a while so you may want to reread the first part which deals with the actual construction of the model. This part is concerned with the painting and Part 3 will deal with “finishing”. (You thought painting it was the end? 😮 )
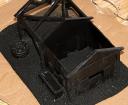
As always, paint it black. I used Krylon Fusion Black Satin. If you sit the can in warm water for 20 minutes and then shake it and use it, the spray will be nice and fine. I also then slop on watered down black paint to get every thing that the spray missed (not much).
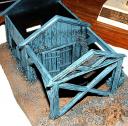 Most of the painting is done using the Dry Brushing technique. I did a very heavy dry brush over the whole model. Very heavy and Very Sloppy. The ground was first dry brushed brown and then I did the building in a Blue/Gray that I mixed. It was a random mix of Cyan, Black, Neutral Gray, Unbleached Titanium. I don’t like using expensive Vallejo or even more expensive GW paint on terrain. I do on the detailing but not on the bulk of the model. I buy large craft bottles or big paint jars. You can get 120-200ml for the same price as the 12-17ml ones that you use on miniatures.
Since the coating was so heavy, I ruined the depth. The model looked very flat now, which was to be expected. I gave the whole model a wash of watered down black ink/magic wash. Magic wash is a mix of water and Future Acrylic Finish. Depending on what you’re doing, the mix varies but a 4 to 1 water to Future is a good start. The magic wash breaks the surface tension of the paint/ink and it flows into every nook and cranny. Not only that, the magic wash draws the pigment into the deep cuts and keeps it there.
I now recoat most of the ground with a lighter brown (~Cobra Leather). I do this at different levels of intensity and very unevenly. I know that lots of people paint their ground green, while this does save time, it isn’t that realistic. Go outside and look at your grass. At an angle, it’s a green carpet but looking straight down… various shades of brown/gray between the blades. Now’s as good a time as any to paint the plants growing up the building dark green. Since the creeping plants are the same material as the ground cover, the only real transition is the color.
Again, I’m pretty messy, I run onto the walls themselves. Basically edge the whole perimeter dark green and pull the color randomly over the ground and up the creases of the stump (the stump is based on my article: How to create a Tree Stump from a Pumpkin Stem). Don’t be too careful, You’ll make a mess of it in the next steps anyway.
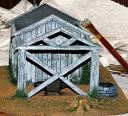 I now dry brush the main building up through dark gray (but not as dark as the blue/gray) to light gray (about 4 shades). The thing to note here is that I’m keeping the green off the center pathway. This gets treated differently than the rest of the ground. It will be lighter and not get any of the ground cover.
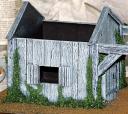
 It’s time to get careful. I go over all the vegetation and fix whatever I screwed up when I was dry brushing. The vegetation now gets a treatment of leafy green paint. This is followed by a lighter shade and a lighter touch on the dry brushing. Finally the tips are dusted with yellow.
 The ground is given a dusting of gray, almost completely changing the color of the ground. The gray is also dry brushed over the stump. This is followed by a dry brush of Unbleached Titanium (Bleached Bone to you GW’ers). I also paint all the metal bits Tin Bitz (a GW color).
The edges of the model are very VERY faintly dry brushed with white paint. Metal parts are dry brushed boltgun metal (leave the Tin Bitz showing). In this pic, you can see the fine sand that I patched over the anvil. I did that on purpose, you’ll see why in the next step. The fire pit is finished a deeper gray to look more like stone. Any errors are fixed up.
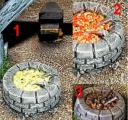
The final step in the basic painting is to finish the anvil, fire pit and cooling trough (which I forgot to take a picture of). Number 1 in the pic shows the coals in the pit painted white, the edges on the anvil edged with chainmail and the sand on the anvil painted light brown. The white coals are given a treatment of yellow ink which I also coat the inside walls with. Using Blood Red, I dry brush the coal, inside walls and metals rods. Remember, fire is inside out to what you are used to. I’ve seen it a lot of times where the base of a flame is painted red up through orange and yellow and tipped with white. The hottest part of the flame is at the center/base and it’s white. Anyhoo, coal develops a black coating with the fire burning deep inside the pile, I dry brush flat black over the coals and inside/top edges of the pit. The yellow ink that’s still visible is glossy and so give the recesses a bit of a glow. I wish the pics had turned out better, it’s hard to see but it looks pretty good in real life.
That’s it for the main building, some extra stuff is done in the detailing but that’s Part 3. That just leaves us with…
The Roof
I’m going to whip through this part and let the pictures do most of the talking. I’ve said this before and I’ll say it again. I hate doing roofs. No matter how good the building is… you’ll screw it up if the roof sucks. It’s a simple enough item and I probably do way more than I need.
- Paint it Black, wash it with a Black Ink/Magic Wash mix.

- Do a heavy dry brush with Dark Brown (a larger brush stops you from going loopy – I use cheap Dollar Store brushes for this).

- Next a dry brush of lighter, richer brown.

- Next, all the recesses are brushed with green. At this point the roof looks awful 🙂

- Now a brushing of Raw Sienna (Cobra Leather – sorta).

- We have the same problem as the early building… lack of depth. A wash of brown ink/magic wash gets us closer to where we want to be.

- I know you’re thinking… “Is this ever going to end?” Heh, maybe. Well… Part 2 is anyway. Final dry brush of unbleached titanium, no white here. This isn’t suppose to be bright. It doesn’t translate well to the screen, but there is a lot of color variation going on here. The green that was soooooo ugly earlier is now just barely visible and mossy looking.

I hope you enjoyed this part, the next part deals mainly with ground cover but a few subtle touches are applied to the building. After the whole thing is online, I’ll review whether I should do more articles of this depth or simplify the steps a bit. I tend to take a few things for granted when I’m working on stuff so gloss over describing them. I don’t think I left anything out here (except the water trough which I forgot to photograph. I’ll touch on it in the next part).



One Response
Stay in touch with the conversation, subscribe to the RSS feed for comments on this post.
Continuing the Discussion
You must be logged in to post a comment.