In this article, well look at the process of taking a common (yet seasonal) object and turning it into a piece of wargamming terrain. Doing this made me realize that, with the right idea and technique, nothing is safe from wargamers.
 |
|
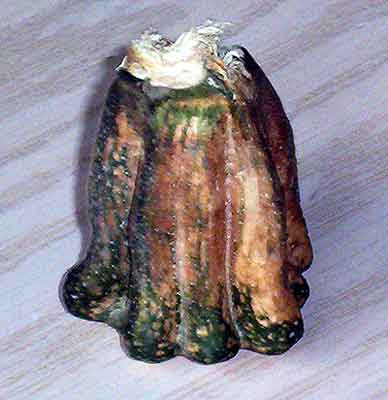
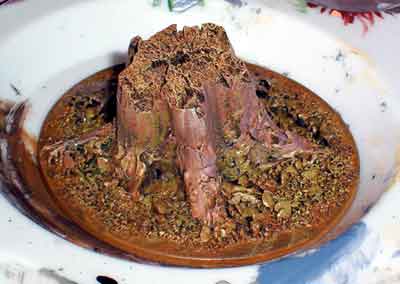
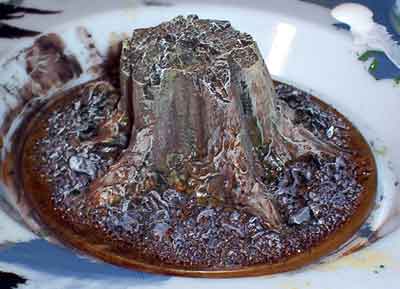
| The basic though here was that I could use the Stem from a Pumpkin to make a tree stump. As you can see in the picture, it looks more like an alien fungus than a tree but I could see the essence of a tree screaming to get out. (Thats the type of stuff us Artistes are suppose to say arent we?) |
 |
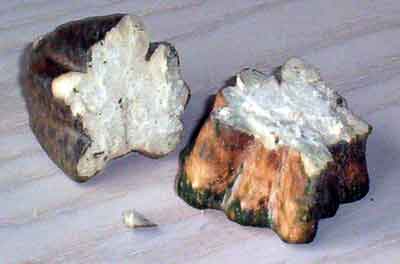
| Break the stem in half rather than cutting it. This will create a rough surface at the top of the stump. Youll need strong hands for this part. The stems are more cellular than real wood would be so care has to be taken not to crush the stem. The edges of the stump are are still too “straight” so take your thumbnail and gouge out hunks of stem randomly along the edge. |
 |
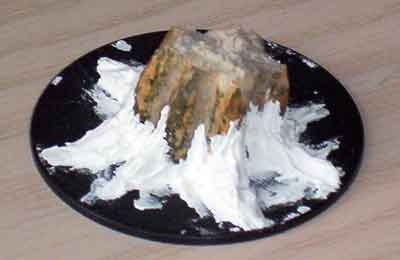
| Flatten the bottom of the Stem by cutting or filing it. Glue it down to the surface you are working on. In this case I stuck it to a 40mm monster base from GW. As you can see in the first pic, the bottom of the stump is rounded inward. I took DAP DryDex, which is a Spackling compound, and sculpted roots onto the base and up onto the “stump”. I followed the shape of the stem and made the roots in random directions. I made it fairly rough and didnt worry about getting it neat on the ground. |
 |
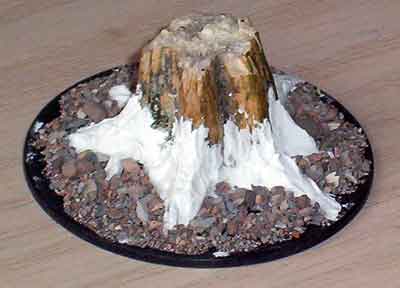
| Once the Spackle was dry (starts pink, drys white), I glued down small stones to the base. I smeared white glue on the base and up to and on to the roots and stump. I didnt try for even coverage and left bare patches on purpose. I let it dry and then mixed a really thin mix of water and white glue (10:1?). I dripped this over the stones with an eye dropper. This soaks into all the nooks and crannies and makes the stones set like concrete. I prefer this method to making a “sand paste”. Thats were you mix sand and white glue and spread it over a surface with a popcicle stick or something. |
 |
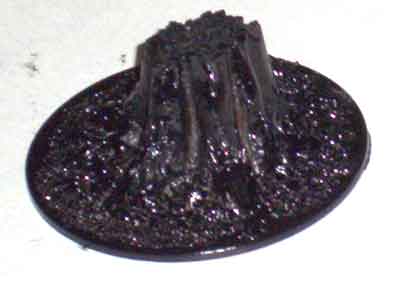
| Not much to explain here; when the glue is dry, spray the damn thing black. If you use white undercoating, youll have to make up your own painting scheme. I did the watered down black coat to fill in parts missed by the spray paint. |
 |
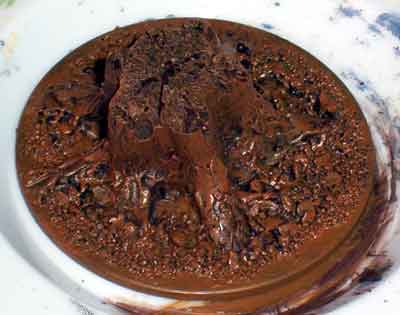
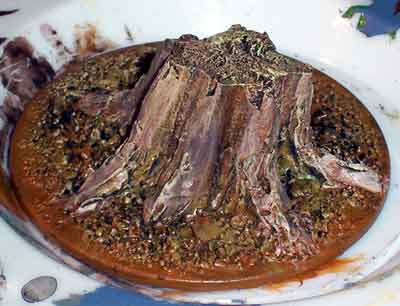
| For this project I used Vallejo Game Colors. The first coat was a fairly heavy application of Charred Brown. I didnt however try and get into all the creases. Its important for the black to be in the creases as it gives the piece depth. Even the ground gets this treatment. |
 |
| I took the colour up a notch to Beasty Brown and put on another fairly heavy coat. I covered less total area this time but still treated the ground and stump the same. I did the coverage randomly too so didnt do the normal “layering” or “blending” method. Thats were you move up through a colour scheme from darkest to lightest, covering less and less area with each stage. I didnt follow any real contours yet. |
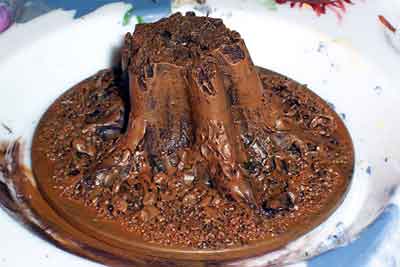 |
| I now moved up to Cobra Leather and randomly coated the ground and stump again same as above except that this is the basic ground colour so I edged the base and covered the flat ground evenly. I also started to paint the stump only from the ground up using a fairly wet brush and a light hand. This causes a wide to narrow streaking going up the trunk. Im still using paint straight from the bottle so far and not cleaning my brushes so the colours mix in random ways. |
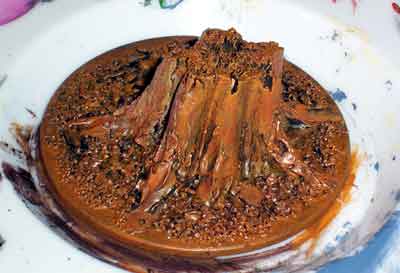 |
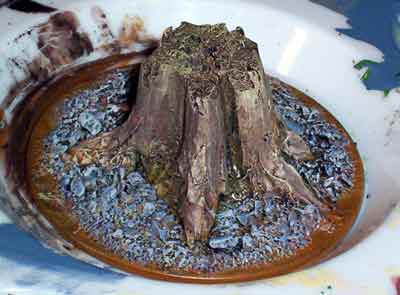
| I now start to treat the stump and ground differently. I took a couple of drops of Camouflage Green and painted random ground areas and creases in the stump. I drew the colour up the stump also with decreasing pressure. Darker, greener at ground level getting lighter and thinner near the top. I took some Stonewall Grey and put a couple of drops beside the Cobra Leather. I did a light dry brush of grey in my bottom to top method. Remember, I still havent cleaned my brush. I also started to pull some of the grey into the Cobra Leather and mix it and pull that randomly up the stump. I also do a dry brush across the top with these various colours. |
 |
| Here it starts to get harder to describe. Taking Dead Flesh and Bone White, I put a couple of drops of each on my palette beside the Grey and Cobra. Using a dry brush technique I go up the stump with random colours, again… never cleaning my brush. Tending to lighter and lighter shades, I pull up the colours and randomly go across the top. The last highlight (so far) is a straight Bonewhite. |
 |
| Time to attack the ground. I put a fairly heavy coat of Sombre Grey down (has a bluish tint). I stay away from the deeper crevasses that have the Camouflage Green in it. Make sure not to cover up all the other colours and stay off the flat ground. |
 |
| Now I dry brush on a layer of Stonewall Grey (already on my palette as I only pull the edges into other colours. I try to leave a blob of raw colour in the center of each puddle. |
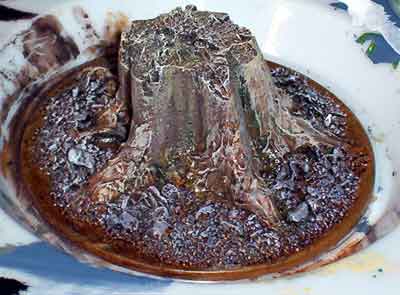 |
| Now an even lighter dry brush of Ghost Grey. I even dusted the stump a touch as grey is normal on trees. It offsets the Bonewhite too. |
 |
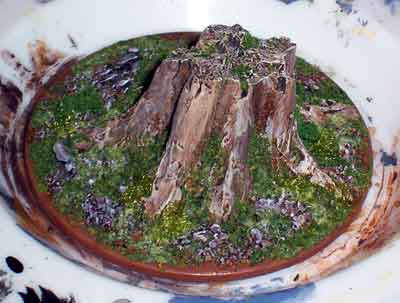
| Ok, last pic. Final dry brush of Skull White on just the tips of things and off to flocking. I put down a 50/50 mix of water and white glue in drops over the ground and dipped it into my flock bucket. I knock off the excess and pull some glue up the stump and a couple of drops on top of the stump. Back into the flock and shake it off.Next I use straight glue and attach some ground foam. I also stuck on some static grass which doesnt show in the pics but looks good in little clumps. |
 |
| Well, thats it. Pumpkin to Tree Stump in 400 steps. The neighbours will be wondering where their stems got to as I take the kids door to door. TRICK OR TREAT {Snapping sound in the background}. |
|

0 Responses
Stay in touch with the conversation, subscribe to the RSS feed for comments on this post.
You must be logged in to post a comment.